One of my flaps wasn't sealing properly (after a tree branch fell on it). When I took it off 1 of the spacer guides was gone - both sides of it from the inside & outside pieces. So. AU$75 plus P & P or fix it somehow. I investigated how they were put together -
These vents comprises a lower, inside trim moulding and a top, outer shell that holds 4 flaps, 4 'winders' and 4 insect screens. The connection between a winder and a flap is a ~100mm long spiral spring held onto the flap with a plastic push-pin.
The flaps are 2 pieces just clipped together. 3 spacer-guides along the bottom, 2 at the top corners. 5 'edge' clips along the top, 2 at each side.
The outer flap is the rain shield and has the hinge pins near the top, each end. When viewed from the inside, the left pin is spring loaded while the right pin is a solid moulding.
The inner flap has a soft gasket all around its inside face for water sealing.
Flaps and winders can be removed easily, the winder from inside the RV while the spring loaded pins on the flaps can only be compressed with access to the outside.
Wind the flap fully open.
Remove the insect screen, 2 clips along the lower edge, 3 along the upper edge.
Use a flat blade screw driver to press down on the 2 clips at the 1 & 11 o'clock positions on the winder while pulling the winder inwards and downwards. Be careful to NOT pull it more than ~25mm inward. Leave it attached to the flap (for now)
Outside push the flap to the left and use a sharp, flat blade screw driver to push the spring loaded pin into the flap then lift the left side outwards.
Fix it -
to create a 'mould' I cut a piece of margarine tub lid to ~20 x 50mm and cut a 0.5mm wide slot 8mm into the centre of one end. I folded it to match the stepped bottom edge of the outer flap, then trimmed it to get a tight fit against the remaining piece of the spacer guide on the outer flap piece -
__ __
\ | || |
\ | || |
\ | |
|_ |____|
-------l l====l
I applied contact cement to the outer flap edge, inside & outside, fitted the folded plastic in place and clamped it to set overnight.
Next day I filled the inside of the 'mould' with out-door liquid nails. 3 coats ending up ~8mm thick. This was allowed to setup hard over night.
Next day I cut away the tiny piece of 'mould' from inside the inside edge and peeled away a small piece of the mould and the contact cement from that area -
|_
l
Yeah I know that the flap pieces can't be separared now ... but they are never intended to be, so no loss.
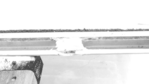
Here's what it looks like after first layer of liquid nails has set and 'mould' cut away from recessed edge (white on white on white on white doesn't show much detail) -
I'll update on the resiliance of this repair in a week or so. I hope others will make use of this info to 'fix' damaged flaps.
bye
-- Edited by bruceg on Wednesday 17th of September 2025 12:35:45 PM
-- Edited by bruceg on Wednesday 17th of September 2025 12:38:06 PM
As an aside, if you are looking for a great glue for all plastics you can use any superglue with baking soda. You can also build a part up by applying the glue, sprinkling the baking soda on , wait sixty seconds, more glue and soda.
It can also be sanded and is hard as.
I used the method today to glue a bolt into a plastic knurled knob on an anti flap thingy.
Great info I need a bigger boat.
I have found that Super Glue (Sino acrylic) tends to lose it's bond when exposed to humid air/moisture. Have you had long lasting bond when adding baking soda? If so, it would be a game changer for using super glue generally.
__________________
Possum; AKA:- Ali El-Aziz Mohamed Gundawiathan
Sent from my imperial66 typewriter using carrier pigeon, message sticks and smoke signals.
Superglue on its own will only work if there is no gap between the two surfaces. Don't ask me why, I'm not a scientist.
Adding the baking soda overcomes that problem.
When overseas, i saw a kid reglue the sole of his shoe using superglue and wait for it..tissue paper.
Cant vouch for longevity, havent paid attention to that.
Google it. There are some incredible applications on such as making a spanner using putty as a mold and layers of the mix.