check out the new remote control Jockey Wheel SmartBar Canegrowers rearview170 Cobb Grill Skid Row Recovery Gear Caravan Industry Association of Australia
Members Login
Username 
 
Password 
    Remember Me  
Post Info TOPIC: Building my own fridge


Senior Member

Status: Offline
Posts: 126
Date:
RE: Building my own fridge


Just made the cut and checked if the self made cover with plug and socket will fit.
It fits. Tomorrow i'll get the solder iron out. And more detailed pictures.

I've chosen to make one up as a plug and the other one as a socket to make sure that I can not accidentially swap them.

Regards, Berni


Attachments
__________________


Senior Member

Status: Offline
Posts: 126
Date:

So, got the solder iron out yesterday only to find out that it was stuffed and did what it wanted. One of my colleages borrowed it
and put it back in the box crook.Confused
Tried hard but it was a nightmare to work with it and because I woke up too late after night shift all proper shops were closed or didn't have
what I wanted. The one you see on the picture is not the one I finished up the job with.
Got a nice Dremel Versatip. Feels rock solid and is so far the best I was ever working with. Not much to explain on the pictures. They speak for themselve.
The extension is long enough for what I want, but it can easy be extended to 2-5 mtr..... without dramas in the function. That offers complete new options for people who want to use this system.
Maybe the manufacturer should have something like that on offer in the future.

Regards, Berni


Attachments
__________________


Senior Member

Status: Offline
Posts: 126
Date:

Got the materials for the two base plates. One for the bottom and one for the middle. Time to start with the bottom.
First, as always, is a thin layer of epoxy with TPRDA.
I also go forward with the top lid. The sides have to be done.

Nothing better on a saturday afternoon than sitting outside with a cold drink and do a bit of sanding and painting. Dodgy

Regards, Berni


Attachments
__________________


Senior Member

Status: Offline
Posts: 126
Date:

Final position of the compressor is determined. And a bit of other work done. Joys of epoxy got me back.
The next few days I'll work on the air supply/exhaust channels. Have to get the thin wood back up.

Regards, Berni


Attachments
__________________


Senior Member

Status: Offline
Posts: 126
Date:

Went further with the air intake cover/channel and I was not happy with the top lid. So I bought some filler powder to get get rid of the orange/golf ball skin at the corners.

Now it looks like it is covered in chocolate mousse baby vomit. Hope, that the sanding tomorrow will be as easy as I was told by the boatcraft guys.

Running out of white pigment and because this top lid has seen enough epoxy anyway I need a good advice for some white paint which is available

at Bunnings.


Regards, Berni


Attachments
__________________


Senior Member

Status: Offline
Posts: 126
Date:

So, early in the morning I was cutting the seals for the top lid (yes, I'll go for seals) because I need the leftovers for the air intake/exhaust channels.
Intake is now done. Happy with that.

I'm working on a final design for the top lid and had a few ideas over night.
First I have to do a long sanding session anyway.

Regards, Berni


Attachments
__________________


Guru

Status: Offline
Posts: 1176
Date:

It is sure taking shape now Bernie...

__________________

oldbobsbus@gmail.com


www.graftoncountrymusic.com.au


Senior Member

Status: Offline
Posts: 126
Date:

Yes, that's right.


It's coming together step by step.

Bottom base is nearly finished. Only the holes for the screws and brackets are missing.
Middle base will be done at the weekend.

Regards, Berni


Attachments
__________________


Senior Member

Status: Offline
Posts: 126
Date:

Went further with the middle base plate and one important job will be done this weekend too.
Found out, that it will be easier to do it that way, but you'll see later.

For now I had to cut a bit off and because I could remember the mess last time when I got the circular saw out Ihad a fantastic idea. Idea
I connected my vacuum cleaner to the saw. How brilliant is that ?

After it had the shape I wanted I put my standard mixture of boatcote with TPRDA on it.

If you look carefully at the pictures you'll see that my vacuum cleaner idea didn't work for 20 cents. Cool

Regards, Berni


Attachments
__________________


Guru

Status: Offline
Posts: 2138
Date:

Have a look inside the bag you would be surprised how good it worked
there is only a little bit on the rug


Cheers John

__________________


Senior Member

Status: Offline
Posts: 126
Date:

Trust me. It looks exactly the same as it was looking weeks ago without vc.

Was next to useless. confuse

Regards, Berni


__________________


Senior Member

Status: Offline
Posts: 126
Date:

Box is married with the mid base. Copper of the holding plate is unwinded. Soft copper......don't underestimate that. Took me a very long time to unwind and I'm looking forward to tomorrow ......

Regards, Berni


Attachments
__________________


Senior Member

Status: Offline
Posts: 126
Date:

It starts looking good.

Drilled the second hole for the pipework, treated it and a bit later I put the holding plate in.
Love it.

The upcoming week will be used to shop around for all the small bits and pieces like brackets and screws, which I'll hopefully use on saturday. Smile

Regards, Berni


Attachments
__________________


Senior Member

Status: Offline
Posts: 126
Date:

Got the message on tuesday, that the bits I am waiting for will not be ready for pick up today. Have to wait for another week.
No drama.
Have enough to do with the existing stuff anyway.

So I drilled all the holes for the covers and for the cooling unit.
The cooling unit was special on its own. The holes on the back are easy assessible but the holes inside were sitting under the fans. So the fans have to go whenever you want to take it out.
Not good.
So I swapped the front feet rubber with the rubber for the holes only to figure out that the feet are too high inside and the fans would not fit any longer.
A sharp knife fixed that. Big Grin
Now the unit can be mounted without removing the fans.

Another thing is the big gap underneath. I have to make up spacers to make sure that I will not bend the metal to death when I put the unit onto the base plate. Additional seal underneath will go in too.

The piece of wood you see on the pictures is a topic for tomorrow as the sealing is too. Bought Sikaflex-Pro (should do the job and is drinking water safe) but the wrong nozzles. Rolleyes

And I've made up 4 support beams during the week.

Regards, Berni


-- Edited by BTSV_Berni on Saturday 8th of February 2014 03:01:16 PM

Attachments
__________________


Senior Member

Status: Offline
Posts: 126
Date:

Could not wait any longer and picked the bits up today. Made up to perfection by Silversunmotorhomes.

Had no choice and put in the seals. After that I fixed the top lid with duct tape to the box to get the exact size. Then I put it onto the first and most important board. Only if I get that right the rest will be an easy fit.

The pictures give you a bit an impression how it will look later on.

Glued the back board on and prepeared the first side board and glued that on too.

Pretty happy so far.

Regards, Berni


Attachments
__________________


Senior Member

Status: Offline
Posts: 413
Date:

Looking good Berni, you're doing a great job and enjoying it. Nothing more satisfying when you've build something which will provide you with so much pleasure and experience in many ways.

__________________


Senior Member

Status: Offline
Posts: 126
Date:

That's right NP


Have been very busy today. Glued lots of boards together and two of them had to be screwed together and the top section fixed with sika.
I chose sika pro. It is adhesive enough, stays flexible and can be cut relatively easy if I have to remove the two panels for maintanace reasons.

The screws will be covered by the little patches you see on one of the pictures. Looks pretty good.

Put the support beams in (3 out of 4) . Maybe I get the fourth done in the evening. I'll see.

All holes are cut too and later on there will be nice covers.


Regards, Berni


Attachments
__________________


Senior Member

Status: Offline
Posts: 126
Date:

Put the last missing beam in and the bottom base plate. Had to fix up a minor stuff up too.
Now it has to cure overnight. Tomorrow the side board (the one with the duct tape) will be prepeared to fit and then the whole thing goes up on its feet for the first time.
Very happy with what I see at the moment. Exactly what I wanted it to be.

Regards, Berni


Attachments
__________________


Senior Member

Status: Offline
Posts: 126
Date:

Today I put it on its feet, prepeared everything as shown in the manual, bought a cheap 12V DC powersupply, put a batch of warm water bottles in it and closed the lid.
Fired everything up and I am very happy.

Holding plate cooled down in 45 minutes from 23 degrees to 0 .
Temperature inside the cabinet dropped from 26 to 22 , which I think is not too bad for a filling with warm water.

I'll see if all the settings are working. The compressor is very quiet and even the fans on highest speed are whispering.

Lot more to do but it's coming up very good.

Regards, Berni


Attachments
__________________


Senior Member

Status: Offline
Posts: 126
Date:

Very happy. After 18 hrs the temperature of the holding plate was at -5.
To make it go up a bit quicker to check if the hysteresis works and it kicks in automatically I left the top lid open for 2 hrs.

How long it finally helds the temperature until the compressor kicks in again will be checked tomorrow. The water was even with the top lid open for that long time chilling cold. And even that was not good enough to rise the temperature far enough. So I had to wait.

Now it started again and I want to see how long it takes to go down back to -10.

At the moment I estimate 1 compressor run every 30 hrs. But that's more guessing than knowing. Time will tell. I'll know as soon as I have this thing in daily use.


Edit:  1 cylcle to cool the holding plate down from -2 to -10 took exactly 1.5 hrs.
Ambient temperature 28 degrees.

Not too bad.

Will measure the current maybe tomorrow.


Regards, Berni


-- Edited by BTSV_Berni on Tuesday 18th of February 2014 07:57:03 PM

__________________


Senior Member

Status: Offline
Posts: 126
Date:

Further tests are in the making. Took the top lid off in the morning when I came home to shorten a few things.

Measured the current. It's starting slow and increases the speed step by step. Ended with a maximum of 6.8 A. Now it's coming to -5 degrees and it went back to 6.5 A.

Took the chance, put the top lid back in and glued the cover onto it. Little helpers are supporting me.

As it looks at the moment it will be ready to do its duties in my kitchen on sunday.

Regards, Berni


Attachments
__________________


Senior Member

Status: Offline
Posts: 126
Date:

Forgot to say that the system, if ready to go, but without fans or compressor running draws 0.13 A. That has to be taken into account.

All together I'll end up with roundabout 13 A in 24 hrs....roughly estimated. Very happy with that. I'll know more as soon as I have it in daily use.

Regards, Berni


Attachments
__________________


Senior Member

Status: Offline
Posts: 126
Date:

Finished up the top lid with sika. Figured out the a 310ml tube of sika doesn't last forever... Confused.
Put the brackets in place which was a fair bit a challenge and put sika onto the top section.
Now it has to cure.

Regards, Berni


Attachments
__________________


Senior Member

Status: Offline
Posts: 126
Date:

Quick job after night shift.

Regards, Berni


Attachments
__________________


Senior Member

Status: Offline
Posts: 126
Date:

Could not sleep anyway so I put the internal bits together and put on the last missing board.
Then I installed the hinge. It came with tiny little brass screws and I gave it a go at the beginning but then I changed my mind and took bigger ones. The top lid has some weight and the little ones would last from 12 to Noon.
Not that bad. Is sitting at the back and no one sees it.

I have a little 1.5mm gap at the left front which I don't really like but I have do find a solution for some kind of handle anyway.
At the moment I grab it with both hands at the sides but later on this will no longer be possible because it will sit flush with the left side on a wall.
So I am looking for a profile or whatever as a handle. This will also cover the little gap.

And I have to make up my mind about baskets for it.

I think that the next fridge will come up better......if I ever build another one.Big Grin . I've made a lot of mistakes and learned a lot.

Thank you all for your attention and your support for now. Not much will happen on this channel for a while.

Regards, Berni


Attachments
__________________


Senior Member

Status: Offline
Posts: 126
Date:

One week of daily use is over and I got a few more realistic values.

Filled between 40-60%. Loaded one day with 48 pee warm 660ml water bottles I end up with
a compressor runtime of 2 hrs in a 24 hr cycle as an average over the week.

I think that this is pretty good. Roundabout 16 A per 24 hrs is far less than ozefridge stated on
their website. Ambient temperature was between 25 - 30 degrees.

So far I don't see the need for a small fan to go inside but this might change.
In the next few weeks of using it I'll get an impression about the best way to design the baskets.

I already have something in mind to make the top lid more user friendly. 
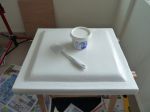
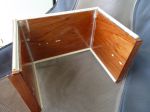
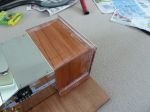
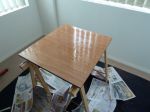
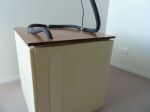
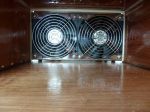
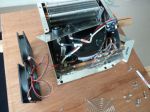
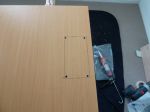
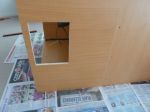
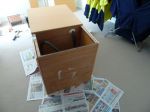
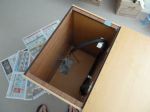
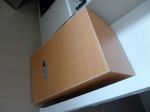
) Will happen next weekend.

Regards, Berni


__________________


Guru

Status: Offline
Posts: 1531
Date:

Time to do a proper test and put a couple of cartons of beer in it mate. Sounds good though, and glad you had succesfull results. What do you think the overall cost (minus labour of course) of the finished? fridge was?

__________________


Senior Member

Status: Offline
Posts: 126
Date:

Cost was roundabout 2700A$. If I would have known what I know now and would make more use of used (left over) stuff cheap to get I could do the same thing for 2100A$. This thing here is pretty well described and whoever want to do the same thing will figure out where it is possible to save big big bucks.


If you go his way ....   http://longlucas.bravesites.com   (very nice and helpful guy) you can make up a super cheap thing. smile


Regards, Bernie


-- Edited by BTSV_Berni on Sunday 2nd of March 2014 11:03:04 AM


-- Edited by BTSV_Berni on Sunday 2nd of March 2014 11:03:25 AM

__________________


Guru

Status: Offline
Posts: 1531
Date:

Ummmm OK.. I think I'll stick to a commercially available one mate, but I won't have the satisfaction that you've had knowing it's something you've built yourself. Especially seeing as the final result looks first class from what I've seen. Cheers Bernie

__________________


Senior Member

Status: Offline
Posts: 126
Date:

No worries mate. At the beginning I thought about a commercial one too but the disadvantages were too big for "me" and for what I want to do in the future. A good thing is to look at your life stile now and at the life stile you want to have if you live permanent in a MH. Set up priorities and stick with them.

The outcome might be surprising.biggrin 
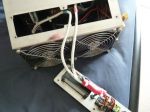
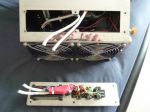
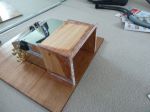
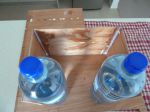
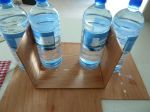
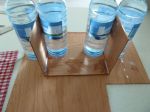
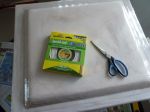
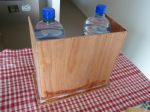
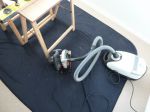
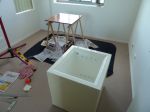
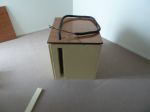
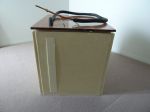
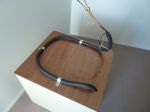
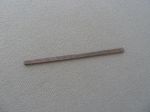
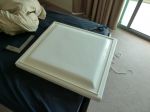
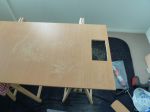
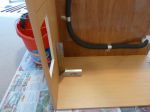
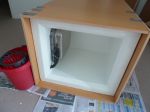
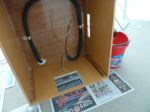
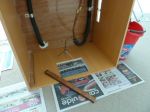
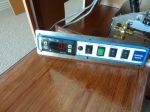
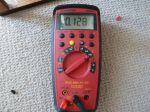
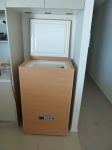
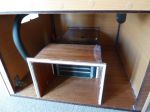
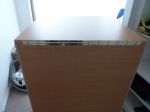
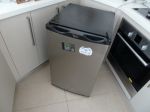
It was surprising for me and I skipped a few of my ideas...........


Building a fridge might not be cheap while you do it but it "can" pay out on the long run. And there are lots of different ways to do it. Not always that expensive.smile


Regards, Bernie


__________________
«First  <  1 2 3 4  >  Last»  | Page of 4  sorted by
 
Quick Reply

Please log in to post quick replies.

Tweet this page Post to Digg Post to Del.icio.us
Purchase Grey Nomad bumper stickers Read our daily column, the Nomad News The Grey Nomad's Guidebook