The silver thing hanging down through the hole feels like its around 45mm long. Hard to see clearly but it looks like the small end is sheared off.
The black rubber ring seems to have absorbed the adjustment bolt.
Very hard to tell from the photo and although I may be wrong it looks like each photo is of a different post, not that it matters. From what I can make out there looks like a threaded rod towards the bottom of the first picture which may be the adjustment. To access to you will need to take the bottom cover plate off that I can see is held on by 1 screw and that may reveal more.
Good luck and hope all goes well for your wife.
Tim
-- Edited by TimTim on Friday 27th of February 2026 10:23:15 PM
Tim they are the same post, one from the front and the other from underneath.
I took that single screw out (threaded) thinking I may be able to remove that plate but it didnt budge.
Thank you for the clarification and I can see clearly now as previously it looked like the one photo was taken from outside. No idea why I thought that 
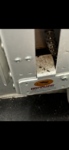
but it was dark when I looked at it. Have you done a comparison with the base of other posts?
The only other thing I found that appears a comprehensive way of adjusting it is on a US forum but you need to be a member to be able to view it. I'm in the UK at the moment and it won't let me register to view it. Probably the same for in Australia but give it a try. If it doesn't work for you I will see if I can find someone in the US to register and send me the PDF file.
Hi Ineedabiggerboat, sorry to say I had a friend in the US join that motor home forum and try and open the link. It looks like management have modified it and it now redirects you to a list of user manuals and and tips but I have gone through it numerous times without any luck.
When he is awake again I will get his login details and keep trying.
Meanwhile are you still able to raise and lower the bed?
Sry to say we have had no luck accessing that PDF document. Had guy in the US join the forum but although we tried numerous times he did not receive the confirmation email. Without that he has been unable to open the document.
Hope the bed holds up for you and that your wife's treatment is successful.
Two more sessions to go and its looking good. Shell have a PET scan end of next month to make sure all good.
Weve left the motorhome up there and have been using my car to go home on weekends.
So drive up tomorrow, bed down, Tuesday morning bed up. Done and back home.
Thanks for trying Tim, much appreciated.
The primary issue was that the chain is tensioned by the bolt protruding from the bottom.
The structure is :
Chain.
Roller.
Bracket to hold the roller which has an adjustment bolt at the bottom.
Base of the post which the bolt goes through.
Underneath the post at the bottom is a thick rubber spacer.
Steel washer.
Tensioning nut.
Problem was the previous owner had the dealer adjust the chain as it was rattling.
He reversed the rubber spacer and the steel washer.
When the tensioning bolt was tightened up, it pushed through the rubber spacer leaving no chain adjustment. At all.
Shout out to Northcoach RV equipment who forwarded an email I sent them to Lippert (who bought HappiJac). They sent two roller sets, rubber spacers, chain links and stuff free of charge to me.
I posted this so anyone searching for a solution to the problem I had, it's here.
Thought I would add somethings that made it difficult and how I solved them.
1- That threaded metal hanging out the bottom slot was actually a self tapping screw that the original installer dropped and just left it. It was impossible to poke it up to the bed rail slots to get it out. Too much distance. After trying magnets, blue tac, tape and other things, I ended up using a length of heatshrink in it. Slipped it onto the screw, shrunk it and poked it up the slot and go it out.
2- There is a zinc annealed bracket at the bottom of the vertical rails that holds the roller assembly and rubber spacer. The vertical rails were clearly installed before the furniture as there was about 20mm clearance on one side and a bit more on the other. I ended up using a set of visegrips to undo the five screws, a pain but doable. I then put them all at the same time, in a vice and ground down to a hex shape. 8mm perfect.
3- It was impossible to get the roller bracket out of the vertical slot so I used a crowbar to open the channel just enough.